Simple Faux Roman Shade Tutorial

My husband and I recently bought our first home and have been working our tails off renovating it. The bulk of the work has gone into the kitchen, which was a touching homage to outdated 80s and 90s style. Thankfully, there weren’t any major issues to repair, but from the heavily worn-out blonde laminate flooring to the honey oak cabinetry to the baby blue countertops–yes, you read that correctly–it needed some serious updating.

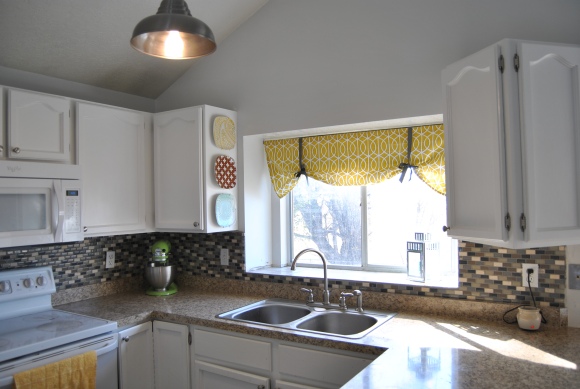
After installing new dark wood flooring, repainting the cabinets to a crisp white, replacing the light fixtures, sink, and especially the unusual countertops, we had a fresh-looking kitchen that was a lovely blank slate . . . but it was in serious need of some color. A bright and happy curtain on the picture window above the kitchen sink seemed like a great way to introduce some personality to the room.

Image

Since I have no plans to actually use this curtain as a true Roman shade, I came up with a simpler, easier way to create the look of a Roman shade with much less work involved. It was quick and easy and only took about an hour to pull together. And I love the vibrant color and pattern it brings into my kitchen!

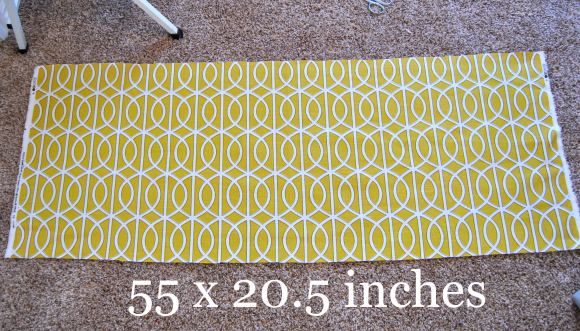
Start by measuring your window–mine was 53″ horizontally, and I wanted my shade to fall about 17″ vertically. Add 2″ to your horizontal measurement for seam allowance, and 3.5″ to your vertical measurement for seam allowance and to sew a ‘pocket’ for the curtain rod to pass through. (So, for my window, this came to 55″ x 20.5″.) Iron your fabric well, and make your cuts. (My fabric happened to be 55″ exactly, including selvage, so I only had to cut the vertical measurement.)

Image

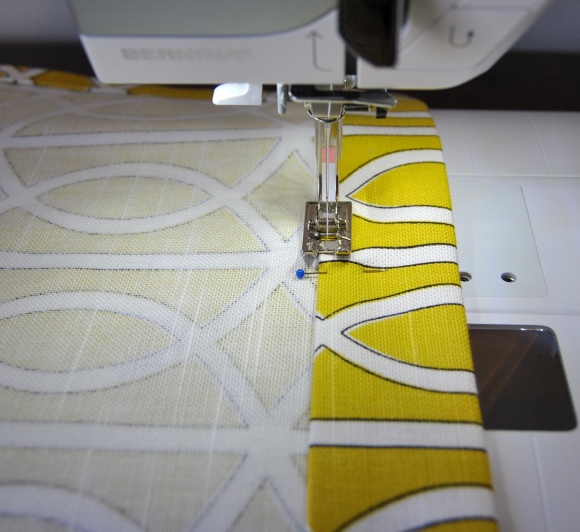
On to the sewing! We’ll start with the two horizontal side seams. Fold the short sides (the 20.5″ long sides) in 1/2″ and press; fold in another 1/2″ again, press, and pin.Image
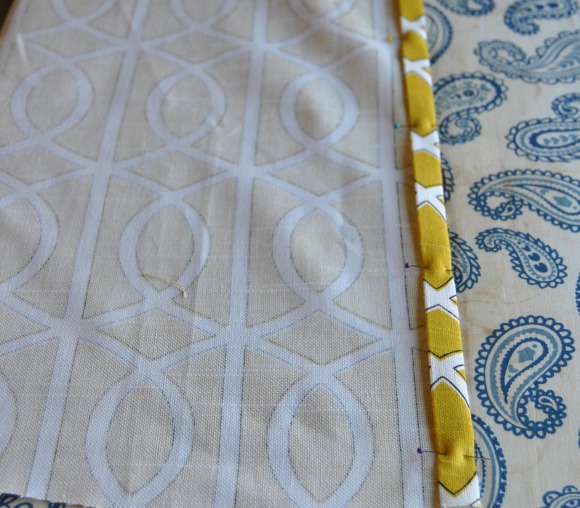
Use your sewing machine to stitch down both sides, close to the inner folded edge.

If your fabric has a top end (mine didn’t), fold the top long edge in 1/2″ and press. Then fold it in another 2 inches, press, and pin. Stitch along the lower folded edge, creating a pocket.

Image

Now fold up the bottom edge 1/2″ and press, fold another 1/2″, press and pin, and stitch (just like the sides).

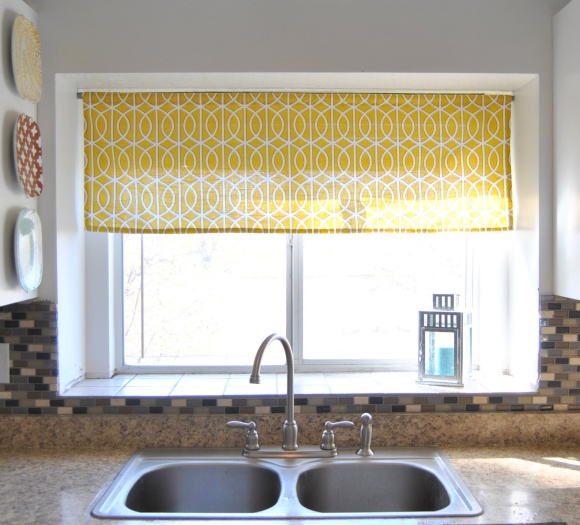
Done with the sewing! You should have a nicely hemmed rectangle, ready to hang. I used a tension rod to hang this in my window space. If you like, you can of course leave the curtain just as it is, hanging straight.

Image

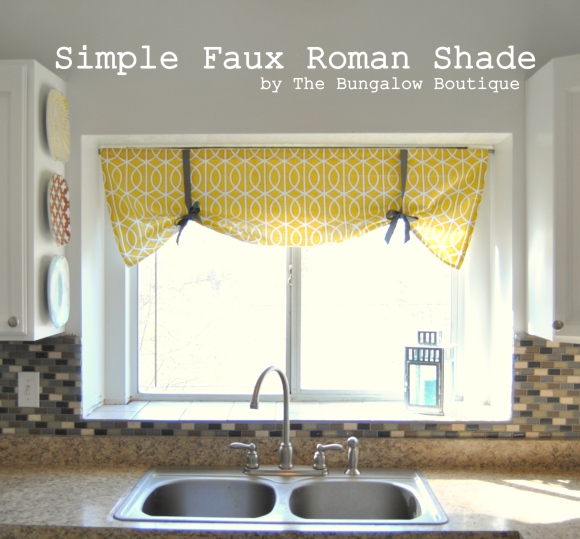
Or if you prefer the Roman shade look (I do!), it’s simple to do. Just find a ribbon that coordinates with your curtain fabric and cut two pieces of it that are twice the length of your curtain, plus a few inches (I just draped the ribbon over the curtain after I hung it up, let it dangle a few inches past the curtain length, and cut it). Loop the ribbon over the curtain, cinch it up until it’s a length you’re happy with, and tie a bow. You can either roll the fabric a bit inside the ribbon loops, or just fold it a little so that it sits nicely in the ribbons, and you’re all set!

Image

If you’d like to see more pictures of my kitchen renovation, DIY projects, etc., come visit me at Maybe Matilda!

— Rachel —

(Linking up this post at Brassy Apple, Making the World Cuter, Keeping It Simple,)
As promised – sweet little boot socks tutorial

A week or so ago I shared with you a picture of these cute little boot socks and promised I’d be back to show you how to make them.

Well, I’m back with the super-easy tutorial.  If you can crochet (which I admit I can barely do), then you can whip up a pair (or two, or four) of these cute boot socks.

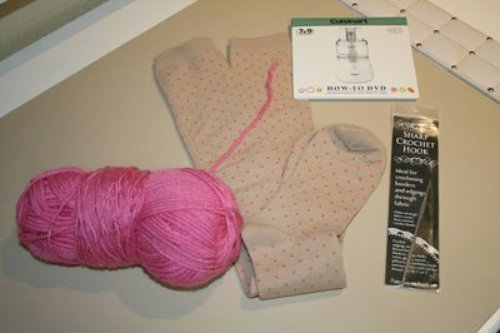
First gather up the couple of supplies you’ll need:  basically a pair of knee socks, crochet yarn in a coordinating color (I used a medium weight sport yarn), and a Sharp crochet hook.  I got one of these nifty little hooks from my daughter Rachel for Christmas, and I finally decided to give it a test run!


I know you’re probably wondering what the CD is for.  No, it’s not to learn how to make bread dough in my new food processor (at least not right now!).  It’s to hold the top of the sock stretched out so that the yarn has enough give in it to go around your calf.  Otherwise these wouldn’t be boot socks – they’d be ankle socks!

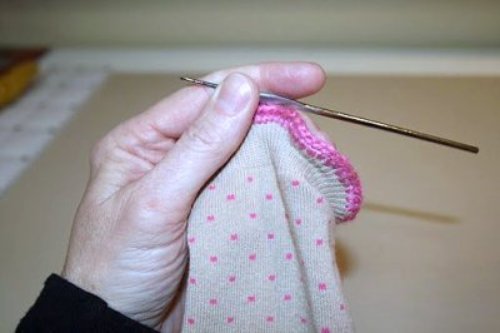
First of all, I inserted the CD cover into the top of one of the socks.  I figured that would stretch it out well enough to make sure the yarn could stretch adequately when it was pulled up.  Then I crocheted the first row, using the Sharp crochet hook and these instructions:

R1: Sc through top of sock every 1/4″.  (This is where the Sharp crochet hook comes in handy – it’s so tiny, and pointed, and it glides in easily through the stretchy part of the sock cuff.)

Once the first row was done, I removed the CD cover and crocheted the next two rows using a size F crochet hook.

R2: *in the same st: dc, ch 2, dc, sk2, st* repeat

R3: *in the ch 2 loop do 4 sc, ch 4 and sl st in first ch* repeat.

Voile!  Three simple rows of crochet in each sock, and you’re done!  I think these would be really cute using a finer yarn and crocheting on the top of some little girls socks.


My kind of crochet project – quick and easy!


Picture gallery wall got you stumped?

I’ve been wanting to put a picture gallery wall up at my house for some time.  Heaven knows my poor wall could certainly use some jazzing up!


I was a little nervous about ending up with a hodge-podge of pictures that just looked like a lot of clutter.  My conclusion was that in order to end up with a clean, organized look, I needed to go with pictures that were edited with the same color scheme, and choose frames that were all the same style and color – and cheap, since I was buying 16 of them!  (Thank you Ikea!)  I think these white Ribba frames were just the ticket.


It was a little tricky to figure out the size and placement of the frames.  My solution was to make a piece of graph paper that equaled the size of the wall.  I found a free site that allowed me to change the dimensions of the graphs to match my wall space.  Then I got busy cutting out pieces of paper to match the size of my frames, and moving them around on the graph paper until I ended up with a configuration that I was happy with.

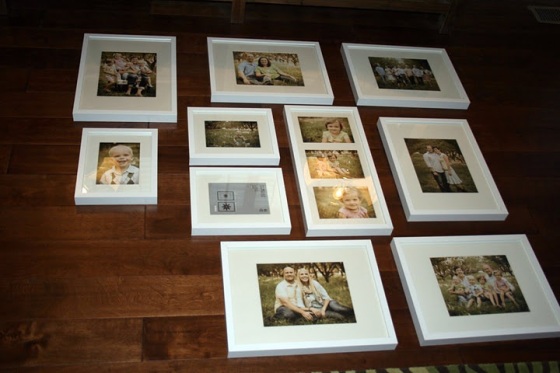
Next came the fun part – translating what was on the paper to the wall!  First I laid out the frames on the floor to make sure I liked the configuration in real life.

Then I measured the dimensions of all of the pictures together.  In order to keep from pictures in a straight line, I taped two pieces of yarn to the wall along the top edge and the bottom edge.  It made it so much easier to make sure things were lined up properly.

After that, it was smooth sailing!  Just got out the old hammer and nails and went to work.


I’m pretty happy with my gallery wall.   What do you think?